Why Sourdough Starters Grow Mold, What To Do About It, And How To Prevent It
Any sourdough baker will tell you that achieving a healthy, active, bubbly starter takes a good amount of time, effort, and patience - not to mention a good recipe. And that’s precisely why discovering a moldy sourdough starter is such a disheartening experience. Did all that hard work really go to waste?
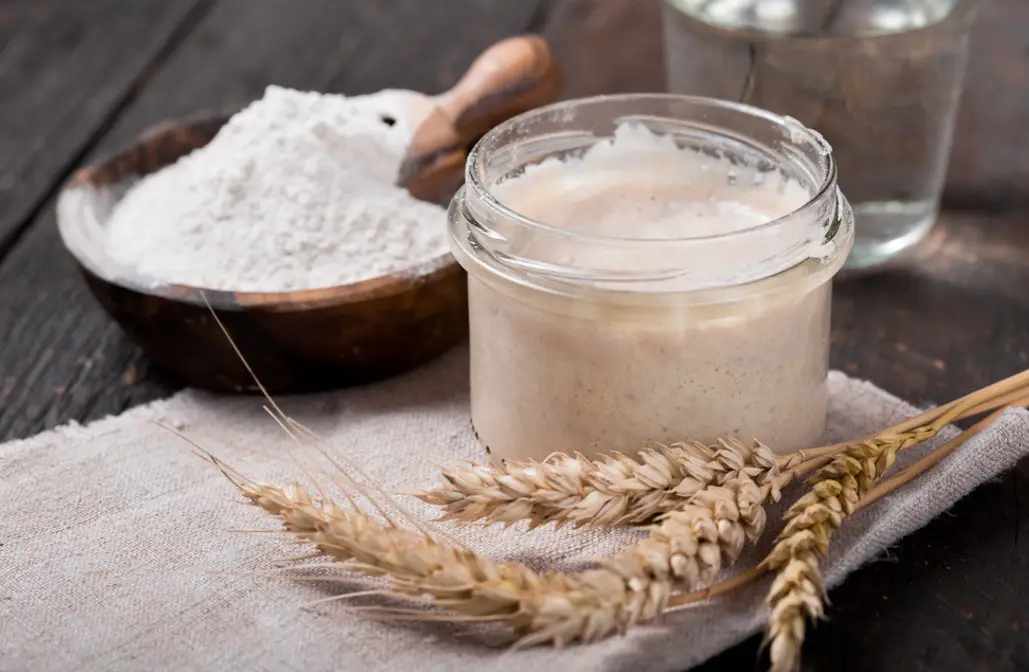
There are a few opinions on the matter, and we will discuss them and more in this article. We’ll let you know how to identify moldy sourdough starter, whether or not you can fix it, and how to prevent it from happening again.
So, don’t give up hope yet - one way or another, a healthy sourdough starter will soon be in your future!
Why Is It Important to Address Mold in Sourdough Starter?
You probably already know the answer: ingesting mold can make you quite sick. In fact, it can cause various illnesses, from respiratory to gastrointestinal symptoms, so it’s certainly not something you’ll want to ignore entirely.
Some people may think they don’t need to address moldy sourdough starter since they’ll be baking it, but that’s simply not true. Baked sourdough bread made from moldy starters can still make you sick, so it’s best not to take any chances.
What Causes Mold in Sourdough Starter?
Unfortunately, there are several reasons why mold may occur in your sourdough starter. Here are some of the most common ones:
- The flour you’ve been using contains mold. Mold spores can pop up just about anywhere in the environment, so it’s entirely possible that they made their way into your flour.
- You haven’t been feeding your starter properly. The good bacteria that develop in a starter are quite mold resistant and can help prevent it. So, if you haven’t been feeding your starter properly, you may not have enough good bacteria to stop the mold from forming.
- You’ve been neglecting your starter. It’s one thing not to feed it properly but another to neglect it entirely. In this case, you’re not even giving it a chance to develop enough good bacteria to counteract the mold.
- The equipment has been contaminated. This isn’t just limited to the jar housing your starter - it could even be the stirrer or measuring tools you’ve been using.
How to Identify Moldy Sourdough Starter
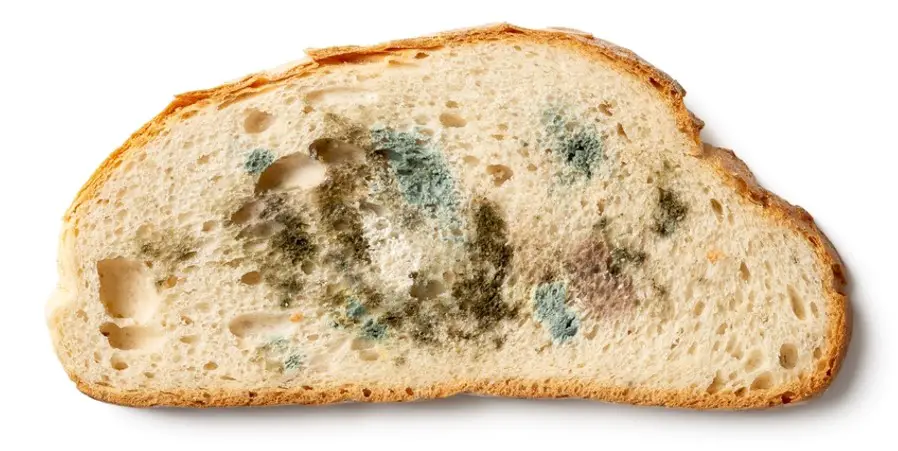
Now, there is a chance that what you suspect is mold is something else. Your sourdough starter can develop some strange-looking stuff, so knowing the difference between mold and normal is important.
Your Sourdough Starter Is Moldy When…
- You notice green, white, or black fuzzy growth. A classic sign of mold, you’ll often see a fuzzy layer over the top of the starter.
- You can see colored streaks, usually pink, yellow, or orange. They may not be incredibly vibrant versions of these colors, but even muted ones are a problem. This isn’t quite a mold; it’s called Serratia marcescens, a harmful, bad bacteria. Like mold, this can also cause various illnesses, so watch out for this.
Your Sourdough Starter May Not Be Moldy When…
- It develops a black or brown liquid. This is commonly referred to as hooch, a safe, natural product of alcohol fermentation. You can either stir it in or discard it before feeding your starter.
- There’s a crust on top. Your starter can develop a crust when it hasn’t been stirred enough in a warm, dry environment. Fortunately, you can prevent this by keeping a damp towel on top or stirring more frequently, at least every 12 hours or so.
- It has a white, powdery foam on top. A natural product of growing natural yeast from wheat, this Kahm yeast is no threat to your starter. You can discard it at the next feeding.
It’s important to note that while these signs are not indicative of mold itself, it is entirely possible that they can occur alongside mold. So, be sure to still keep your eye out for those pink, orange, or yellow streaks, as well as any fuzzy green, black, or white growth on your sourdough starter.
How to Fix Moldy Sourdough Starter
Now, onto the big question. You can undoubtedly revive your sourdough starter if needed, but can it be saved if you have officially identified mold on it?
And the answer is…it depends.
Some people say no, absolutely not. While the mold may only appear on the top of your starter, there is always the chance that the spores have grown beneath the surface and spread throughout the rest. You don’t need to be able to see mold spores for them to be there, and that is precisely why many sourdough bakers will toss an even potentially moldy starter.
However, some folks are willing to take their chances and have done so successfully. So, if you’re determined to save your sourdough starter, try following the steps below.
1. Dig out about one teaspoon of non-moldy sourdough starter.
If there appears to be a layer of mold on top of the starter, you can peel it off to get to the non-moldy stuff underneath. Or, if you suspect that the mold goes deeper than that, take a spoon and dig right to the bottom of your starter jar.
Once you find about a teaspoon worth you’re happy with, remove it from the rest of the starter.
2. Mix the teaspoon of starter with about 3 tablespoon + 1 teaspoon water and ½ cup + 2 tablespoon flour in a new clean container, and cover.
The mixture will sit near the bottom of the container and will be covered in water.
3. Leave for two days. Then remove the liquid, take about a teaspoon of the mixture in the bottom, then mix with the same amounts of new flour and water.
Mix that one teaspoon with another 3 tablespoon + 1 teaspoon of water and ½ cup + 2 tablespoon of flour in a new container.
4. Repeat two more times.
It may seem like a long process, but there are two key reasons. One, by letting it sit for longer, you’re increasing the acidity of the starter. This will not only increase the sourness of your starter, but it will also help kill off any remaining mold spores.
And two, you’re putting your starter into anaerobic (no air) conditions. Mold needs oxygen to grow, so you should be able to prevent it from growing further by restricting its oxygen.
It’s important to note that there is no guarantee that this process will kill any mold spores in your starter, so you are taking a chance here. If you want to be 100% sure that your sourdough starter is mold-free, then the best thing you can do is start from scratch.
Sure, it’s tough to throw out all that hard work. But if you think you’d benefit from that peace of mind, it’s likely worth it. Besides, even a hint of that moldy taste may ruin your sourdough breadsticks!
How to Prevent Moldy Sourdough Starter
If you want to avoid making the call on whether or not to throw out your moldy sourdough starter, then you should do everything you can to prevent it from happening in the first place. Let’s look at some things you can do to prevent moldy sourdough starters below.
Try a Different Flour
One of the easiest things you can do is switch up your flour. It can be challenging to tell if your flour contains any potential mold-causing contaminants, so that could be the issue.
This could also be an excellent chance to see if a different variety of flour gives you better results for your starter. Rye flour, for example, tends to be one of the best types for sourdough starters, so give it a try if you haven’t yet!
Change Your Feeding Schedule
If the flour isn’t the problem, it might be your feeding schedule. Your starter needs to be fed regularly to help that good, mold-preventing bacteria to develop, so be sure not to neglect it.
You should feed your sourdough starter recipe at least twice daily if you keep it on the counter during the establishment phase. Once it is mature, you can bring the feedings down to once daily. However, use your discretion - if it’s starting to deteriorate, you may need to up the feedings.
Related:5 Signs Sourdough Starter is Ready to Bake With
Weigh the Ingredients
Now is a good time if you have yet to invest in a kitchen scale. Using cups to measure the water and flour for your starter may be easier, but weighing your ingredients often ensures better results.
You can ensure your sourdough starter is being fed properly by getting the ratios and measurements right. This will help good bacteria develop and thrive, hopefully keeping any potential mold spores at bay.
Practice Good Kitchen Hygiene
As mentioned before, mold spores can come from just about anywhere in the environment, so cleaning your starter-making equipment thoroughly is essential. So, do your best to ensure that your starter jar, measuring instruments, stirrers, and anything else you use to make your starter are spotless.
It’s Time to Make Moldy Sourdough Starter a Thing of the Past!
Now that you know how to identify and prevent moldy sourdough starter, whether or not you want to try and fix it is ultimately up to you. While there are sourdough bakers out there who have had success fixing their moldy starters, only some are willing to take that chance.
So, if you prefer to keep things safe, get rid of the entire starter and try our prevention tips. If you pinpoint the cause of your mold problem in the old starter, you can get fresh flour, water, and a clean jar to start again.
Making a healthy sourdough starter is the first step to getting a delicious loaf of sourdough bread, so we hope these tips work for you.

