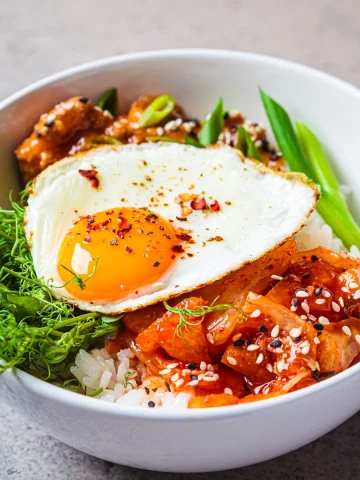
Kimchi Recipe
Kimchi is one of my favorite foods, and I’ve been thinking about making it for quite a while now. Beyond my own procrastination holding me back, I was also a little intimidated by the process and a little scared that I would end up just making myself sick by not doing it right.
After watching countless video tutorials and reading many recipes online, my mom found this recipe titled “The Best Korean Kimchi Recipe” posted on CiCi Paradise website. We watched the video several times, and it looked so amazing we had to try it ourselves. The bright red spicy sauce was calling our names.
We tried to get all the ingredients, but because we live a little off the beaten path, we had to do the best we could with what we found.
Our substitute ingredients included applesauce instead of apple puree and shrimp paste instead of salted shrimp. And since we could not find any lance fish sauce or dried cod, we just did without.
If you would like to find some good substitutes for salted shrimp please read my post titled What is a good substitute for salted shrimp?
We could have ordered the other items online, but we really wanted to get started. Maybe next time.
The Process:
First, we cut the napa cabbage in half and filled a large bowl halfway with water, and mixed in about five tablespoons of the rock salt until it was completely dissolved.
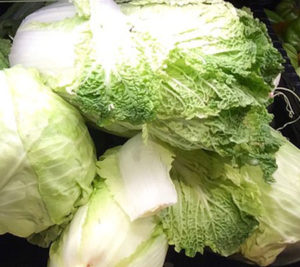
I dipped the napa cabbage halves in water and salted them in between each leaf. It is important to salt each layer so that the cabbage can brine correctly.
After the cabbage leaves were salted, I submerged them in the bowls of saltwater and placed a weight on top to hold them down. I used a pie pan to do this.
We then let the cabbage sit in the brine for four hours. You can soak the cabbage overnight, it just depends on how salty you like your cabbage.
While the cabbage was brining, we made the kimchi paste.
The next steps involved cutting the vegetables and making the sweet rice flour mix.
In the video, CiCi and Chef Esther talked about how it would take about 10 minutes of boiling for the sweet rice flour to reach a paste-like consistency.
Ours took approximately 40 minutes to reach the consistency of paste.
To make the paste we mixed the rest of the ingredients: matchstick-size daikon radishes, pureed ginger, garlic, onion, unsweetened applesauce, salted shrimp paste, anchovy fish sauce, plum sauce, Korean chili powder and two tablespoons of the sweet rice flour.
Next, we rinsed the cabbage halves to remove the excess salt and peeled each leaf apart layer by layer and rubbed each leaf with the paste.
DON’T forget to rinse out the salt, you don’t want to ruin the recipe by making it too salty. I found this out the hard way in a recent batch I made.
Remember, that you have three other halves of cabbage so make sure all the cabbage will get an equal amount.
Once we completed rubbing each cabbage leaf with the spicy paste, it was time to stuff them into the mason jars. We used two one-quart jars.
Pack the kimchi down tight and firmly secure the lid.
TIP: Next time I will definitely slice the cabbage into small pieces. The large leaves of cabbage rolled up are hard to remove from the jar. Small pieces would make it much easier to handle and remove individual size portions.
We left the kimchi out at room temperature for two days. Afterward, we put it in the refrigerator for a week. The cold refrigerator slows down the fermenting process.
Related: Best Temperature for Fermentation
From there you can leave it in the refrigerator for as long as you like if you like a strong sour flavor.
When we ate the kimchi, it was scorching hot, and I had to drink two glasses of milk to stop my mouth from burning.
TIP: My suggestion would be to use a lot less Korean chili powder and more plum sauce to sweeten it.
Korean chili is a spicier chili than what you would typically buy at the supermarket. Plain chili and Mexican chili don’t even come close.
After we made this batch of kimchi I still really wanted to eat the spicy kimchi, so I decided to make a batch of sweet kimchi without the chili powder and combine them.
Homemade Sweet Kimchi Recipe
I followed the basics of the same kimchi recipe. However, I went a little rogue and added zucchini, leaks, canned bean sprouts, and soy sauce. I also omitted the applesauce, just because I didn’t have any on hand at the time.
Here is my own Sweet Kimchi recipe that is truly kid-friendly.
When I mixed the two kimchi together, it tasted so much better. The spiciness of the original batch calmed down considerably and we were able to really enjoy it.
One thing that I did notice was that the new batch had a slightly fishier taste. I think it was like that because the sweet kimchi did not have the spiciness to combat the fish taste.
Next time: I’ll cut back the shrimp paste to about ⅛ cup.
Ingredients
- 2 medium Napa cabbage
- 2 tablespoons of sweet rice flour
- 5 tablespoons rock salt
- 1 cup daikon radish, cut into 2-inch matchsticks
- 3 tablespoons ginger, minced
- 2 tablespoons garlic, minced
- ¼ cup onion, pureed
- ¼ cup salted shrimp paste (use less for a less fishy taste)
- ¼ cup anchovy fish sauce
- ¼ cup plum sauce
- ½ cup zucchini, sliced thinly
- ½ cup can bean sprouts
- ½ cup leek, sliced thinly
- ¼ cup soy sauce
- 5 tablespoons white sugar
Instructions
- In a big bowl, combine 1 cup of water and two tablespoons of rock salt, mix to dissolve the salt, put the Napa cabbages inside the bowl and rub rock salt on every leaf. Let the cabbage soak for 5 hours, then flip and leave for another 5 hours, or overnight. When done, drain all the excess of water.
- Rice glue: add the rice flour and 2 cups of water to a saucepan and bring to a boil. Reduce heat to medium-low. Cook for 20 minutes (might take a little longer), continually whisking, until the liquid is thickened to a ribbon-like consistency. Set aside to cool.
- Kimchi paste: In a big bowl, combine the daikon radish, sweet rice flour, ginger, garlic, onion, salted shrimp paste, anchovy fish sauce, plum sauce, zucchini, bean sprouts, leek, soy sauce, sugar and mix everything into a thick paste.
- Place the cabbages in the bowl and rub the paste into every single leaf. Chop up the cabbage into 1 -2 inches pieces to easily place into the jars.
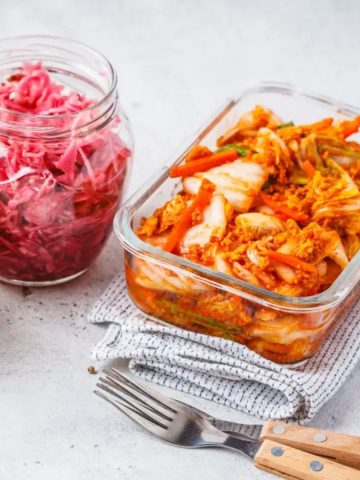
- Tightly pack the kimchi into jars and cover with a lid. You can also use a plastic container, as long as it covered tightly to prevent air from getting inside and ruining the fermentation process. You can see in the picture I used plastic wrap with a rubber band.
- Leave the kimchi out at room temperature for at least two days, or longer if you prefer a stronger flavor. Then put it in the refrigerator for another five days.
- Enjoy


